Friday, April 27, 2012

Looking like a beached whale

Finally, my paddle board begins to take shape!  Last summer I went to Vancouver, Canada and saw orca pods (killer whales to be politically incorrect) off of Granville island.  I imagine if one of them ended its life on the Canadian shores, its skeletal remains would look something like the current state of my paddle board.

The paddle board kit includes ten bulkheads, which look like ribs.  The bulkheads are labeled 1 through 10.  1 for the aft, or front, of the paddle board and 10 for the bow, or back.

 
Laying out the bulkheads accordingly


In the picture above, you can see copper wire that I've cut into four inch segments.  I drilled holes into the side panels, threaded the wire through and twisted the ends on the outside of the panels (pictured below).  This is the stitching of the stitch and glue method.


Stitching the bulkheads to the side panels

Finally, you can see the purpose of the sheer clamps.  The bulkheads simply sit on top of them while the stitching and gluing takes place.


Bulkheads sitting on the sheer clamps


You can see the paddle board finally taking shape!  By the way, if you're wondering....yes, I'm building the paddle board on top of a beer pong table (which is on top of a Foosball table).


And there it is!  The skeletal remains of a beached whale.


Thursday, April 26, 2012

Fiberglassing the upper deck (sounds like a boxing move) and gluing the side panels

After the upper deck of the paddle board was joined together, it looked like this:

I sanded down the rough spots  to give the deck a smooth surface.  The side that's facing downward will be the top of the board, where I stand.  The side you're looking at will be on the inside of the board (remember there is an upper deck and lower deck, and sideboards in between).  I had to fiberglass the inside of the upper deck (this paragraph is really getting wordy), so I laid a fiberglass cloth over top the board and squeegeed epoxy over the surface.

Laying fiberglass cloth over the deck

It always blows my mind how fiberglass becomes invisible after it's been glued.  I swear I'm usually not that easily entertained.
After the fiberglass has been epoxied to the deck
You'll see in my post next week that the paddle board will begin to take shape.  Right now it looks like a thin surfboard, though the end product will be quite the contrary.  There was one last thing I had to do before I got there, however.  Yesterday I wrote about the sheer clamps and said I would explain their purpose later.  Well, I still won't get to their purpose today, but I did glue them to the side panels, and I promise, you will see they become useful in my next post.


I used ten clamps on each side board to hold the sheer clamps down.  I hope that was enough, otherwise, the sheer clamps won't be secured and I'll be even more behind.  (At least this weekend is supposed to be cool and rainy, so I won't feel like I'm missing out on the river....boy, did that sound redneck or what?)

Wednesday, April 25, 2012

Gluing the Jigsaw Puzzle

To securely assemble the jigsaw pieces together, I used epoxy glue (the same substance I used to waterproof and glue my boat).  Epoxy can be your best friend or your worst enemy.  It works like no other glue I've used before (which is limited to Elmer's, super glue, glue sticks, and wood glue), but if you get it on your clothes, get ready to say sayoonara.  To get an idea of what it's like when it dries, think about the old man's cane in the movie Jurassic Park, and how the prehistoric mosquito was trapped in the fossilized amber.  Epoxy is transparent and glossy like amber (minus the yellow tint), feels smooth as a pearl, hard as a rock, and could probably kill any insect that comes across its path. 

Photo courtesy of celebrityscraps.com

Epoxy comes in two parts--resin and hardener.  Both the resin and hardener are liquids, but in order for the glue to activate, two parts resin and one part hardener must be stirred together.  Last year when I made my boat, I, being the person of haste that I am, had a difficult time measuring the batches evenly.  As a result, I would wake up to find a sticky surface when I should have expected a dry, smooth run with my fingers.  Luckily this time around, I've made a life upgrade by using pumps to dispense the glue.  The jug of resin has a pump twice as long as the jug of hardener.  That way when I make a batch, I squeeze one pump of resin, one pump of hardener, one pump of resin, one pump of hardener, and so forth until I get as much as I need.

Before I mixed the epoxy with cell-o-fill (powder to thicken the glue), I laid the boards down according to how they would be connected.  Then I lathered the mustard-consistent glue along the jigsaw edges.  I fit the pieces together and laid a paint stick across the seams to pad the wood as I lightly hammered the pieces tightly in place.

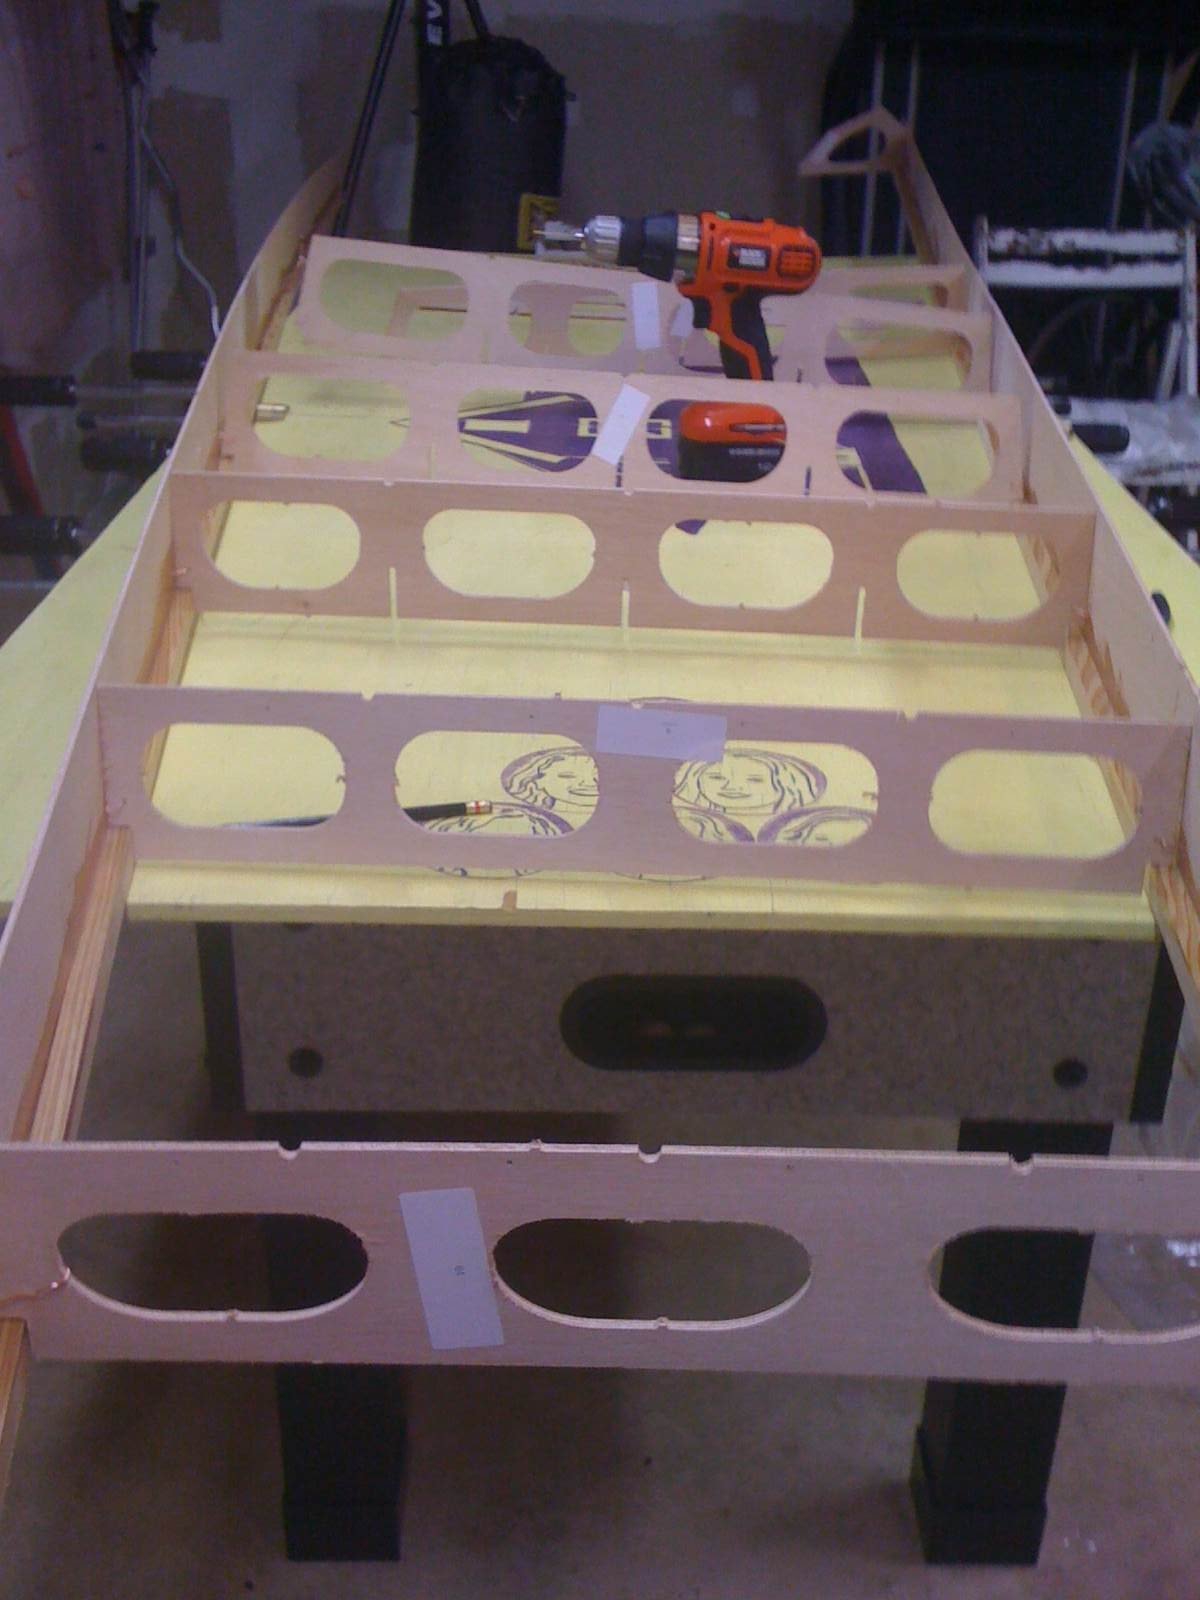
The picture below is of the bottom deck of the paddle board. 

Bottom deck of the paddle board

I'm making my paddle board at my best friends Meggie and Laura's (my kindergarten classmates) house.  At my convenience, there are free weights in their basement from the previous tenants.
                                                    
Using free weights to hold down the boards while the glue dried

The below are sheer clamps. Rather than explaining their purpose now, which I will do in my next two posts,I'll just tell you what I'm doing in the following photos.  The sheer clamps, or sticks you see, are over 8 feet long each.  I had to make the sheer clamps twice that length, so I expoxied the scared joints so that I had two extra sheer clamps (this explains scarfing and scarf joints: http://werebuildingaboat.blogspot.com/2011/03/step-4-scarfing.html).
Scarf joints on the sheer clamps

Expoxied the scarf joints joints and clamping them down
These are the sideboards.  They'll run along the sides of the paddle board to give the vessel its depth.  I glued and joined the pieces (two pieces for each side).  Once the epoxy had dried after 24 hours, I cut fiberglass strips and epoxied them down along the seam to create extra sturdiness.  
Before I epoxied the fiberglass

The fiberglass has been epoxied on and looks completely clear
After the bottom deck dried, I also applied fiberglass strips along its seems.  

So much drying going on.

If you really didn't want to read everything I just wrote, and only wanted to see the photos and read their captions, maybe this will help:

I glued these pieces together


Monday, April 23, 2012

It's about time - Building the Paddle Board Begins!

It’s about time I began blogging again.  DC’s early spring is turning into an early summer and that can only mean one thing… I need to get out on the Potomac.  As I promised back in September, I would build a stand-up paddle board.  After much delay, it is finally happening.

Unlike Baby Red, who was built from scratch, I purchased a kit from Chesapeake Light Craft (CLC) in Annapolis, Maryland.  I have been waiting to visit CLC since I began building my rowboat last year.  They build handcrafted boats, kits for the ambitious, and have a showroom you can visit.  It was spectacular (for me at least).  


In the Chesapeake Light Craft workshop

Some boats in the works
After I lugged home the 12.5-foot Kaholo kit, I found that the box included all the pieces, epoxy, and fiberglass I needed.

Snapped this photo after I opened the box


You can see that the pieces are cut a like a jig saw puzzle.  I got my hands dirty over the weekend and I will follow up with the results of that!