Thursday, March 31, 2011

Unwinding on H Street

After a long afternoon of cutting lumber, Katy and I were exhausted to say the least.  We thanked my dad for letting us use his shop (the garage), and headed back to the District.  Despite our tiredness, there was no better way to end the weekend of boatbuilding than a lovely trip to H Street—without any exaggeration, the city’s quirkiest neighborhood. 

Our first stop was H Street Country Club.  It is the only country club I can access ….because it’s not really a country club.  It is a bar ingeniously designed with indoor mini golf on the second floor, and shuffleboard and skeeball on the first.  I challenged Katy to a couple rounds of skee.  …I won 2 out of 20 games.  Ok, I’d rather not talk about it.

Skeeball (Photo courtesy of http://www.thehstreetcountryclub.com/)

Indoor minigolf.  You have to go to get the full experience!
The outside of the H Street Country Club.  Only the finest country clubs are covered in astro turf.


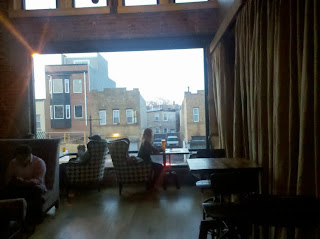
After we finished our frozen margaritas, we walked up a block to Smith Commons—H Street’s newest gem.  It’s a three story bistro.  The first floor is the main dining room, or smith, while the second and third are lounges.  The craftsmen ship on the inside is a vintage style (my favorite) with perfect accent lighting, unique furniture, and an array of textures. Perhaps my favorite feature, however, is the two story window overlooking H Street  …or maybe it’s the deck outback. 
Photo courtesy of http://www.smithcommonsdc.com/

Photo courtesy of http://www.smithcommonsdc.com/

The smith was busy and popping (especially for a Sunday), while the third floor lounge was hosting a birthday party.  So we found a nice spot in the middle.
Katy relaxing by the window

Step #5 – A Place For a Mermaid

The trickiest cuts we had to do were for the bow stem.  The bow stem is the very front of the boat, also known as the cut water.  When I continue to get that confused look from people as I explain, I tell them, "that’s where the mermaid hangs on a ship."  Then finally, I get that Ahhhh response.  Of course...it ONLY takes a topless woman to get people’s imagination going.   I blame a male dominated society for that.

Mermaid figurehead hanging onto the bow stem
We had to a cut our board at numerous angles, so we first built a jig.  The jig was a tool we used to help us control our board as we ran it through the table saw.  The nook in the jig is where we placed our board (soon to be bow stem).  We angled the table saw blade and ran the jig and board once on each long side to get a beautiful piece.  (This was really hard for me to explain, so hopefully the pictures below give you a good visual.)

Jig tool we built.  The nook on the left side is where our board sat as we ran it through the table saw.


Putting our jig to use.  In this picture, we flipped the jig over to cut the other side of the board.  Note: the saw blade is angled.

After our two cuts

The final product!

Wednesday, March 30, 2011

Step #4 – Scarfing

As I stated in my last post, I will explain how we join our sideboard extensions to the sideboards.  We can’t just glue the boards together because the bond won’t be strong enough with that amount of tension. We had to scarf 'em!  (If informational = very boring for you, this will be very boring)
The arrow is pointing to a scarf joint
Basically, we had to angle the edges of our boards before we glued them together (see picture above).  Remember, our sideboards are only ¼” thick so we can’t just cut them plywood at an angle; we had to sand them down to get that gradual slant.

I thought this process was going to be a pain; fortunately, it wasn’t as bad at all.  I’ll use our photos to illustrate the steps of scarf joining. 
1.       We nailed our 4 sideboards about 2.5 inches apart
2.       We sanded down the edges of the boards
3.       …and we kept sanding until the steps became a ramp

4.       Eventually we got our nice, smooth ramp

5.  Next, we flipped the sideboard extension upside down so that the angles fit perfectly into each other
6.   We spread glue on the surfaces where the boards would be joined, sandwiched them in between boards, and hammered them all together to clamp them while the glue dried. 


Diagram courtesy of http://www.unclejohns.com/
7.       Once the glue was done drying, we removed the homemade clamp and sealed the nail holes

Tuesday, March 29, 2011

Step #3 – Sawing Wood

I don’t think this post can possibly get as many hits as Lobster Pregame, so I will make this one short and sweet. 
After we devoured our lobster rolls, we headed out to the burbs to start cutting our plywood.  We began with the sides of the boat (the simplest cuts).  Our boat will be over 9.5 feet long, and since plywood typically comes in sheets no longer than 8 feet, we had to cut additional pieces to elongate the boards (think: Ke$ha’s hair extensions…similar principle).  (I will explain how we join these extensions together in my next post.)  In total, we cut four pieces for the sides of our boat.

An example of the pieces we cut for the sides of our boat

Katy pulling our sideboards from the table saw

Our last easy cut was the transom (the trapezoid on the back of the boat). 

From left: Cutting the transom; man with pretty hair showing an example of a transom

I will write separate posts for trickier cuts, but this is just a starting point.

Monday, March 28, 2011

Lobster Pregame


Before we began cutting our lumber, I thought it was only appropriate we do a seafood pregame.  My good friend of 20 Something Passions blogged about a truck that drives around DC selling lobster sandwiches (http://20somethingpassions.blogspot.com/2011/03/lobster-roll.html).  Umm…only my dream come true.   For the first time in my life, I found Twitter to be of some good use and figured out where that truck was headed.  We left the bungalow and headed straight passed the cherry blossoms to Eastern Market.  Yes, we were those people that started forming a line at 7th & D St., SE.  And yes, the truck had not even arrived.  It was one of the most thrilling Saturday mornings of my life.  I am being 100% serious.

According to the guy taking orders, he and his highly efficient staff have been doing this for about 8 months.  He was incredibly patient despite our indecisiveness and gave us a free drink (probably because we were holding up the line).  It was D-E-L-I-C-I-O-U-S and there was a variety of Maine Root sodas to choose from (soda fountain machine built into the side of the truck).  No doubt about it, I will be a repeat customer.

Check out our photos at 20 Something Passions.  For more about these lobster rolls, go to http://www.redhooklobsterdc.com/.

Step # 2 - The Lumber

Most professional boat builders will recommend you build your vessel out of marine plywood (a rare find in the DC area ...maybe not in Annapolis).  It is nice, but very pricey.  Luckily, I read that exterior plywood would do just as well marine as long as I fiberglassed and sealed my boat correctly. 
I went to the hardware store in search of exterior plywood.  To my surprise, even exterior plywood isn’t available in most hardware stores these days.  Apparently it’s a product most homebuyers don’t regularly buy…and apparently I stand alone when it comes to amateur boatbuilding. 
Cousin of proud owner of Sheets Wholesale
Since Katy and I are planning to build at my parents’ house, I called a few lumber yards out that way.  For anyone in Northern Virginia, Sheets Wholesale Inc is the way to go.   They had exactly what I needed and gave me quotes on the phone.  I drive a Toyota Yaris; which for those of you who don’t know, is about a step up from a Volkswagen Beetle.  I needed a pick-up truck, so I dragged my dad and his Tacoma out to Sheets Wholesale with me at 6:30am before work (yes, I have a job) on Wednesday morning. 
…And that is when we met Mr. Sheets.  I thought the place was called “Sheets Wholesale” because they sold sheets of plywood.  Nope, that’s the owner’s name.  Sheets introduced himself, told us his cousin was former MLB player Larry Sheets, asked if we knew Larry Sheets, asked how old I was, asked if I was adopted, told me I didn’t look like my father, and pulled me behind the counter to show me that the prices he gave me on the phone were indeed discounted.  I saved a total of $12!  Thanks, Mr. Sheets.
For the sides and bottom of the boat, I bought exterior ¼” A/C fir (the A means one side is the highest quality—nice and smooth, the C means the other side is a C-grade quality with a lot of knots, fir is a type of tree (learned that in Miss Birnbaum's first grade class)).  For the transom or back end of the boat, I bought ¾” B/C fir (B-grade is solid and doesn't have as many knots as C) .
The A and B sides will be on the outside of the boat, and the C sides will be on the inside.
The front and back of the plywood. A-grade side (smooth and solid), C-grade side (notice knots)

Friday, March 25, 2011

Step #1 – The Plan

I realize that I’ve gone off on many tangents, but seeing that my one follower is the biggest LOST fanatic ever, he should be quite accustomed to following the rabbit as they say.  Don’t worry, I will begin to get into the building process right now…after a few more words. 
Being someone of haste, I like to jump right into things without seriously considering all possible outcomes.  I do it all the time.  In this instance, however, my pride is in the way of failure.  I have too many skeptics and I’ve made my three-week-long dream too public to let anything shatter it.
In an effort to keep my boat afloat, I hunted for the best boat plans available.  At first, I came across some downloadable software that shows you how to build over 250 different boats.  I was like, O hell ya!  The more Googling I did, however, the more I saw this “software” pop up under different domain names.  Each time it suspiciously said the item was marked down from $97 to $49.  Seemed a little too hoaxy to be real.  So I scratched that idea.  Next, I read Ultrasimple Boat Building.  It had 17 different plans for plywood boats.  It actually gave me some good tips, though not as many as Devlin, and it didn’t have any boats that I fancied.  Scratched that one for now too.

Then, I came across something I could work with—an SK-97, designed by Uncle John (http://www.unclejohns.com/).  It’s a 9’7” two-person skiff (three seater available in SK-115 design).  I emailed Uncle John to make sure this boat wouldn’t take me and Katy down with it (it is a small boat after all).  The man was real nice and responsive.  He provided me with some more information about the different models.  He even has a preview of the plan on his website, which was really nice (I am a hesitant shopper).  A number of builders have posted their results (http://unclejohns.com/skiff/builders.htm). It looked good to me  ...And sold!  I paid $32.50 for the plans (not bad from what I've seen online, and I didn't mind helping the guy out).  Uncle John emailed me the plans in a PDF (hard copy available for $37.50).  The instructions are very clear with pictures, descriptions, and measurements.  The best thing about the sale, however, is that if I have any questions, I know Uncle will help me out.  Best Uncle I never knew.

That completes step #1—choosing a plan

FYI: I did see some free plans online, but none were as simple and clear as Uncle J's.
Photo courtesy of http://www.unclejohns.com/.  Click the image for boat specs.

FAQ and the Perfect Answer

The more I dreamed about building a boat, the more obsessed I became.  I Googled, read books, and watched Youtube videos.  Within a day, it was all I could talk about.  Everyone I came across had to hear me talk about boats, building boats, wooden boats, types of wooden boats, and online boat building communities (i.e. http://www.duckworksmagazine.com/).  About 96% of everyone I encountered thought this was nuts...like it takes an expert to float a boat (though people have been boating for over 40,000 years.  Pretty sure those ancient people didn't go to Harvard).  These are the typical questions I was asked:


Q: A BOAT?
A: ….yes

Q: How are you going to build a boat?
A: Plywood, glue, fiberglass

Q: Where are you going to keep this boat?
A:  There are a number of boat houses within 15 minutes of walking from my bungalow.

Q: What are you going to do when it sinks?
A: Swim.

Q: Why wouldn’t you just buy a boat?
A: ………………..um………………….because. It’s cooler…it’s more self-satisfying to build your own stuff. I dunno…

I didn’t have a better answer than that.  Then I started reading Devlin’s Boat Building, and as soon as I cracked open the book, Devlin answered that question so perfectly.  He says,


Few things are more satisfying than crafting a pile of rough wood into a beautiful, graceful boat.  It is a soul-satisfying psychological and physical adventure.  For me it is the essence of creative expression, and anyone can benefit from it…a boat is a living structure that reflects the builder and his or her spirit.  As it takes shape you can stand back and survey it with pride, and see what you’ve created with your own hands.


Beautiful, Devlin.  Absolutely beautiful.


Thursday, March 24, 2011

The Month of March

When I first moved to DC, I was continuously working on the bungalow I call home.  Day after day, night after night, I was getting my hands dirty.  I bought an unfinished cupboard off of craigslist and finished it to match my kitchen.  I even learned all there was to know about toilets because I was too stubborn and proud to call a plumber.  (Eventually, I had to throw in the towel and call one.  Creepy experience.  I cleared my mind afterwards with some Kelly Clarkson music videos.)  So after a few months, I had no pending projects.  The bungalow was complete.  And I had nothing to do.

One month Katy and I watched a lot of movies.  (January is now Movie Month ..FYI.)  So before this month actually began, we brainstormed themes for the month of March.  I suggested we do home projects.  (I was inspired to do things around the bungalow again after watching the HBO film Temple Grandin.)  And so it was declared, March would be Project Month.
A week later I was at the library and I came across a sign, literally.  It said, “March is National Craft Month.”  What are the odds?! The craft gods were telling me I had to build something fantastic.  Crafts and home projects are nearly one in the same, right?  Kind of?  We totally called that! And craft + home project + my need to feel accomplished = homemade boat.  Right?  Ok, maybe a stretch, but it was like it was supposed to happen.  It takes a crafty, project-oriented person to build a boat I’d imagine.  And if we start building this month (there’s only one week left), our boat should be ready by the time some nice weather comes around.

Among other tasks: my shower was in need of a new caulk job and Katy’s sink needed to be unclogged.  We’re really going all out for Craft/Project Month, I know.  (Seriously though, pulling out that old moldy caulk made me gag......that didn't sound right when I read those words aloud.) But we’ve taken care of these mundane chores, so now we can focus on the boat.  Thank God.

Wednesday, March 23, 2011

That's right.. we're building a boat!

About three weeks ago I woke up one morning and realized I was having a mini crisis.  As always, I confronted my friends:


me: i feel like doing something cool, but i dont know what
Natalie: today? you mean a hobby
me: no.. in my life..
Natalie: a trip?
me: like..  an experience. not sure what. something i can do and later i can say i did it. and it was good. or i did a good job at it
.. now that my name isn't appearing in the centreview**.. i just dont feel as accomplished as i used to


Megan: hahah what??? how often was your name appearing in the Centreview?


**Centreview - local hometown paper


Ok, ok, so maybe my name wasn't appearing in the local newspaper THAT often in the early to mid 2000's, but it was often enough that I never had self image problems as a chubby teenager (reality - Facebook did not exist for noncollege students, so I did not see many pictures of myself) and I somehow thought neighbors at the Giant grocery store would actually recognize me (reality - never really happened).


So then out of nowhere...


Bonnie: what kind of inventive things do you want to do?
 me: well i just googled how to build a rowboat


And that's how this idea came about.  Although Bonnie so kindly told me that building a rowboat would not get my name in the Centreview again, the thought of building my own boat and taking it out on the water sounded so beautiful that I started telling everyone about it.


Of course, I had to lure someone in with me (as I do with all of my schemes).  So regardless of whether Katy actually wanted to do this or not, she agreed to help me build the boat (hence the blog title "WE'RE Building a Boat) ...she's so nice :)  With that said, it will be OUR boat...kind of like when two people share a dog..or a child.


Please follow me through my posts.  I will keep everyone updated on our progress...or regress.  If you have tips or suggestions, or just want to drop a hello, please comment.  If you have mean things to say, say it on your own blog. 


(Actual Gchats were copied and pasted into today's post)